
Sharing all of our tips and tricks for how we created this awesome and easy DIY ping pong table top storage for less than $25 with pictures. Our DIY ping pong table top has become a focal point of our basement wall and takes up ZERO floor space!!!
DIY Ping Pong Table Top Storage
*this post contains affiliate links for more information check out my disclosure page HERE*

If you have been following our blog for even a little bit, you would see that we made some changes to our basement once again!
First it was a kid’s Lego and video game room, than Jason’s office, an exercise room and now a Game room/ office, ha!
As our kids get older, our basement has definitely changed along with them.
With the older two away at college, we moved their exercise equipment out to the garage which honestly is where they would rather work out.
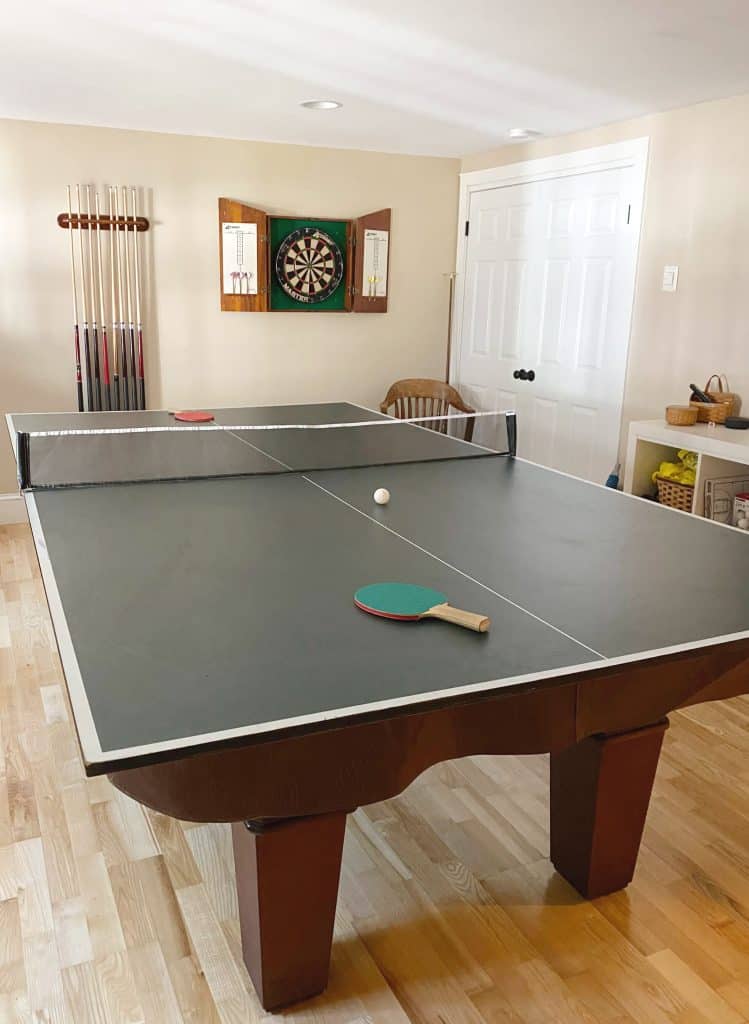
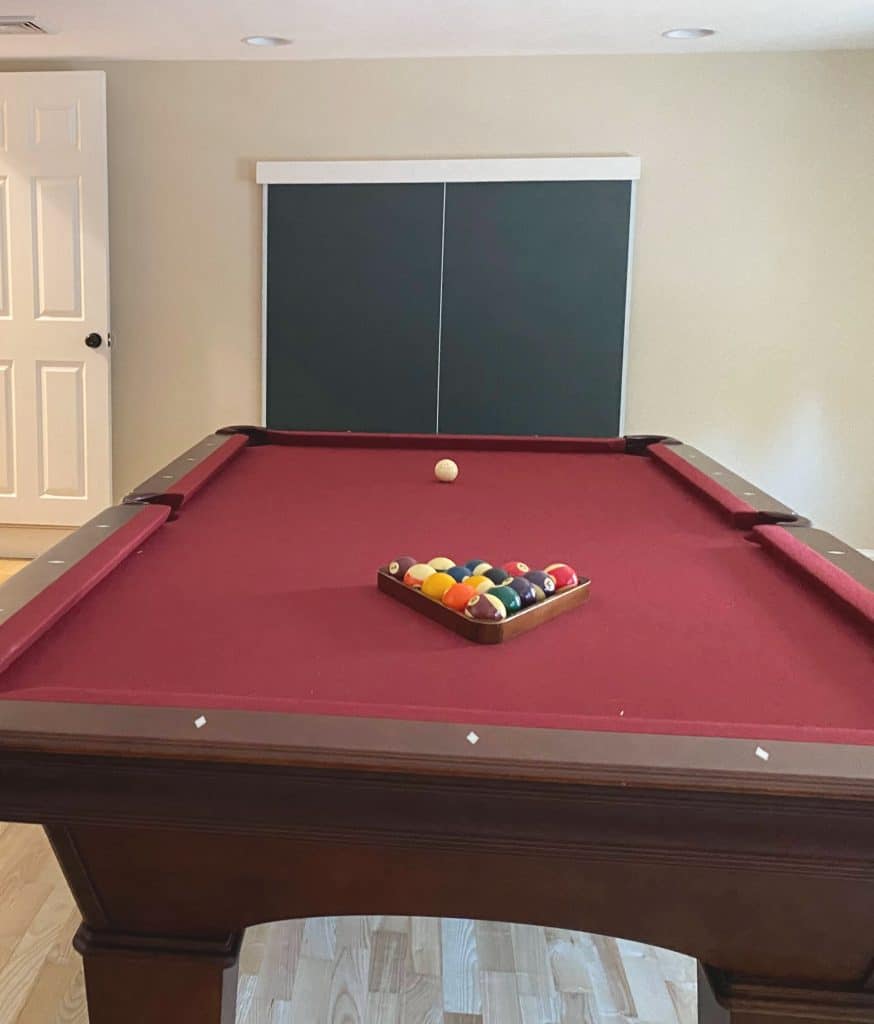
We have wanted a pool table for a LONG time and Jason found this awesome 2nd hand one for a great price not too far from our farmhouse.
Our new game room has become great spot for our older kids to hang out with their friends away from the rest of us and gives them something that doesn’t require a screen.
The only problem we had with our new ping pong table top was where to store it when we were playing pool.

Size of a Ping Pong Table Top
The ping pong table top that came with our pool table has 2 identical board tops that are 60 inches wide by 53 3/4 tall by 3/4 inches thick.
Supplies & Tools Needed to Store a Ping Table Top
- (2) 2 by 4 Boards
- (2) Primed pieces of 1 by 4
- Miter saw
- Level, ruler and a pencil
- Screws & Cordless screw driver
- Finish Nailer and finish nails
- white semi gloss paint
How to Create Wall Storage for a Ping Pong Table Top
The first thing we did was measure the length, width and depth of the ping pong table top.

Since the ping pong table tops are 60 inches wide, we cut 2 (2 by 4 boards) 60 inches wide with our miter saw.
We decided to center the ping pong table top on the basement wall to make it a feature and break up the look of our long wall.
We screwed the 2 by 4 boards into the basement wall making sure to screw them into the wall studs so it was secure to the walls.
We cut 2 (1 by 4) pre-primed boards to 61 1/2 inches long to cover the front of the 2 by 4.
To cover the sides of the 2 by 4, we cut 4 pieces of scrap (1 by 4) 1 1/2 inches in length.
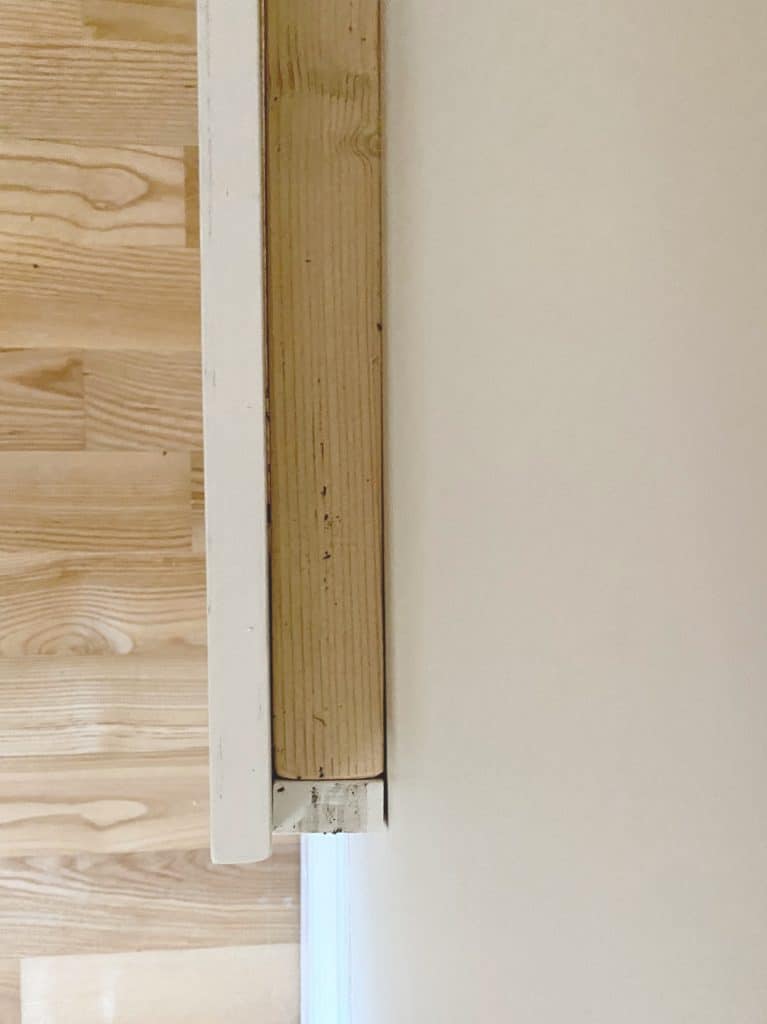
We nailed the primed pieces to the front and sides of our 2 by 4 with a finish or Pin Nailer to give it a finish look.

Lastly, we painted the top and bottom boards with a coat of semi gloss white paint to give it a more finished look.
The ping pong table top slides right in place and looks fabulous hanging on the wall of our basement game room.
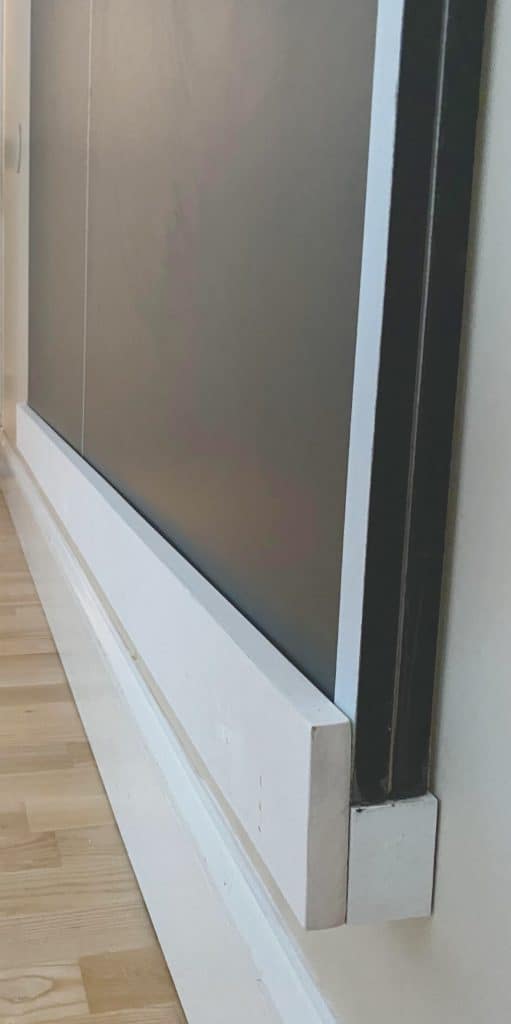
The best part of our new wall storage for our ping pong table top is that it does not take up any precious floor space and therefore doesn’t get in the way of the cue sticks when our kids are playing pool.
I hope this inspires you and answers any questions you have for how to create storage for your ping pong table top!
by Tara Lehman
More DIY Projects You Might Enjoy


I love how you hung the table on the wall. We have been trying to decide what to do with ours. I’m wondering if when you’re taking it in and out if it scratches/dings the wall up? Having teens move it back and forth makes me think the wall would take a beating haha! I’d love to know how it’s working for you. Thanks!!
My husband and I usually hang the ping pong table boards up so we have been lucky to have only banged into the wall once or twice and Mr. Clean magic eraser helps with the marks. Thanks for stopping by to check out our DIY ping pong table top storage!