
Sharing all our tips & tricks for how to build a Horseshoe pit for your backyard that rocks with step by step instructions & pictures! Our DIY horseshoe pit was super simple to make (even the kids wanted to help), inexpensive to build, & our whole family loves to play it!
Table of Contents
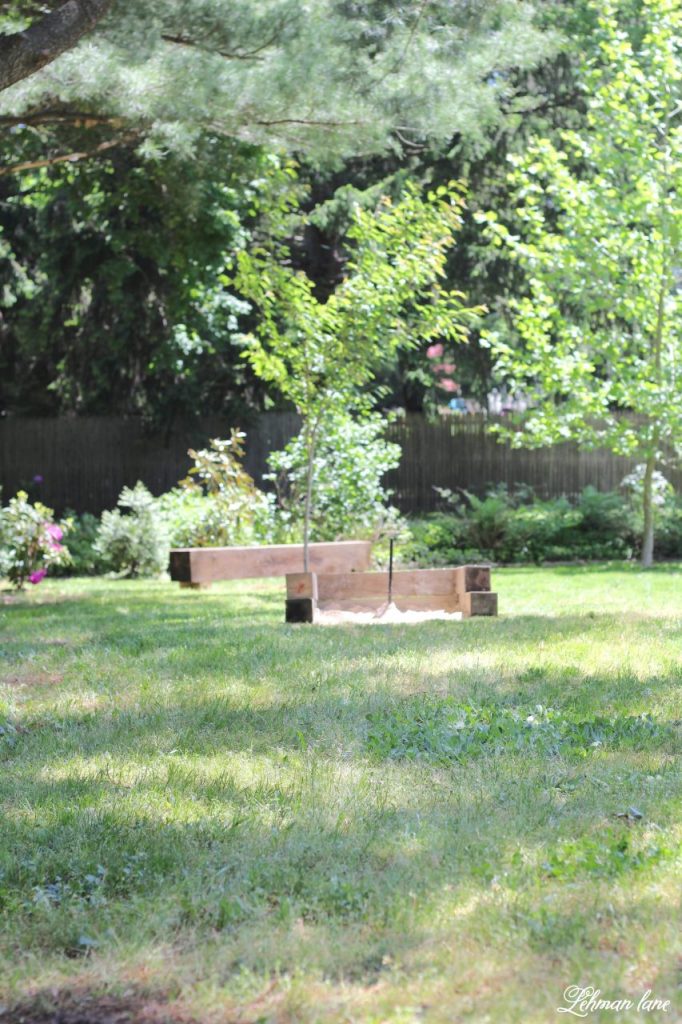
DIY – How to Build a Horseshoe Pit
*this post contains affiliate links for more information please click here*

Full disclosure, I am TERRIBLE at playing horseshoes. I look like I am trying some sort of tricky dance move right before I let go of the horseshoe… thankfully my kids still let me play!
Where to Put your Horseshoe Pit
When deciding how to build a horseshoe pit location is important.
We chose to build our backyard DIY horseshoe pit close to our house & outside lights so we could continue to play horseshoes at night with friends & family.
Jason recently added 2 more long beam benches to this spot (like we built around our gravel fire pit) which will give players a place to watch.
The location we chose to build our DIY horseshoe pit is shady in the afternoon & evening so the players can stay cool playing in the summer.
Supplies & Tools Needed for How to Build a Horseshoe Pit
- 6 by 6 pressure treated posts or railroad ties
- Circular Saw to Cut the 6 by 6 posts
- 10″ galvanized nails & small sledge hammer
- landscape fabric
- Staple Gun & Staples
- 2 Outdoor Stakes
- 2 Bags of Sand
Size of our Horseshoe Pit Boxes
Each Horseshoe Pit is approximately 40 feet from one another & each DIY Horseshoe Pit is 48″ long by 42″ wide by 12″ high.
The Cost of Building a DIY Horseshoe Pit
Since we already had the pressure treated posts leftover from taking down our former deck & the landscape fabric & horseshoes, we only had to buy the sand, stakes & galvanized nails which cost us about $10-$15.
Even with buying & building everything new, you can definitely keep this Outdoor DIY Project for how to build a horseshoe pit under $100.
Step by Step Instructions for How to Build a Horseshoe Pit
Step ONE – Cutting the Pressure Treated Posts.
Believe it or not, we STILL have wood left over from when we demoed our deck to create a sunken brick patio.

We used the leftover pressure treated beams to create the areas around the horseshoe stakes.
Jason cut the posts to the size we wanted after we decided how to build a horseshoe pit with his circular saw.
Step TWO – Nailing the pressure treated beams together with galvanized nails.

Ryan helped nail in the 10″ galvanized nails (similiar to these,NATIONAL NAIL 54275 5-Pound 10-Inch Spike Nail ) to hold the boards in place.
The boys ACTUALLY wanted to help us with this project, Woo Hoo!
I don’t know about your kids but there aren’t too many outdoor DIY projects our kids want to help with!

Step THREE – Adding Landscape Fabric to the bottom of the Horseshoe Pit
Once the U shaped boxes were built we stapled landscape fabric to the back of the pressure treated boards to help keep the grass from growing in the boxes.
We placed the horseshoe pit boxes we created about 40 feet from one another in the shade.

Step FOUR – Hammering in the Stakes for the Horseshoes
We let the boys hammer in the horseshoe stakes with a small sledgehammer.
We found these stakes at Lowes in the concrete section.
You can also find them on Amazon, (HERE).

Step FIVE – Add Sand to each Horseshoe Pit.
If you are trying to learn how to build a horseshoe pit, you will definitely want to add sand inside each horseshoe box to protect the horseshoes & to level the ground around each stake.

Step SIX – Playing Horseshoes
My in-laws had recently given us these fun chippy horseshoes that they were no longer using which helped spur on this outdoor Diy project! 🙂


I hope this answers all your questions about how to build a horseshoe pit & inspires you to create one of your own that will provide years of horseshoeing fun for the backyard!
Please reach out in the comments below if you are trying to learn how to build a horseshoe pit & have any questions about the process!!!
by Tara Lehman
If you liked our How to Build a Horseshoe Pit post, you may want to check out all of the Outdoor DIY Projects we created at Lehman lane see them HERE
Don’t forget to pin our tips for how to build a horseshoe pit to your favorite DIY projects board on Pinterest!

Some more Outdoor DIY Projects you might enjoy


Hello, I love your DIY horseshoe pit! I do have one question for you. When you say they should be 40’ apart do you mean the front of each pit or do you mean the stakes are to be 40’ apart? Can’t wait to make a few sets for my cabins I have in Big Bear, CA.
Thanks for stopping by to check out our blog post for how to build a horseshoe pit Kandy. We spaced the stakes 40 feet apart. Good luck making some for your cabins. I am sure they will get a lot of enjoyment!
Going to do this soon!!! You were the deciding factor! Your steps are ready to follow!!! Ty ty ty !
Good luck with your DIY Horseshoe Pit Cindy!
The 40’ measurement is stake to stake. So the “pit” you construct should be a couple of feet each way around the stakes to allow the shoes to land and slide in (for a ringer) or near the stake for a point. Make sense?
I have see where the stakes seem to lean to the center of the game. Are they placed @ an angle, or does that happen over time, with play and the shoes hitting the stakes make them lean?? No? Wrong direction…
Thanks for stopping by to check out our post about how to build a horseshoe pit Beth! Yes, the stakes do get knocked sideways from time to time based on mostly kids, horseshoes, weather, etc. 🙂 They are easy to hammer back in place when they get too wonky. If we chose to cement the stakes in they would stay straight but didn’t want the hassle of taking out cemented stakes in the future if they rusted or we decided to take out the horseshoe pits at some point.
Set your stakes a minimum of 21 inches from the front of your box. Be sure the stakes are sticking up about 14 or 15 inches from the ground. Drive the stakes down so they lean toward the other pit at a slight angle of about 3 inches (12° Lean toward you)