
Sharing all the details of how we added a beautiful white bead board ceiling and shiplap in the master bath with pictures.
This DIY master bathroom remodel has been a HUGE project but today I am finally able to share some progress with you guys.
I confess that we were knee deep in this DIY project and are unfortunately missing a few step by step pictures of the process…especially the bead board ceiling.
DIY Bead Board Ceiling & Shiplap in the Master Bath
*this post contains affiliate links for more information check out my disclosure page HERE*

For this master bath remodel, we started by gutting what I believe to be the world’s ugliest bathroom, ha! (see it HERE)
Our master bathroom tub had a slow leak for a while so EVERYTHING in our former bathroom needed replaced.
We started by taking out the heavy terracotta tile. (see our tips for taking out tile fast HERE)
Once everything was out we could started with a blank slate.
We have been busy adding things back into the space like a bead board ceiling & shiplap in the master bath.
Why we Chose Bead Board & Shiplap in the Master Bath
We LOVE adding bead board & shiplap to our farmhouse… especially in high traffic rooms like bathrooms & kitchens.
The strength of the wood helps straighten our crooked old plaster walls & ceilings as well make them easy to clean!
Adding Bead Board to the Master Bathroom Ceiling
As you can see from this pic, we didn’t even wait till the master bathroom was completely gutted before adding the bead board ceiling!

Jason added 2 by 4’s to the former bathroom ceiling to give the vinyl bead board something strong to screw into.

The vinyl bead board is tongue & groove so it is easy to install.
We found the vinyl sheets at Home Depot. (find them HERE)
The vinyl looks like the real thing, is inexpensive, holds up to the hot water & steamy showers our family members are known to take. 🙂
After screwing & pin nailing the bead board, he added wood boards to hide the seams in places where our ceiling is wider than 8 feet.
We covered all the screw & nail holes with plaster & painted them ceiling with a white primer & paint combo from Lowes.
For more questions about how to add a vinyl bead board ceiling (see where I share about adding vinyl bead board to our Boys Bathroom HERE)
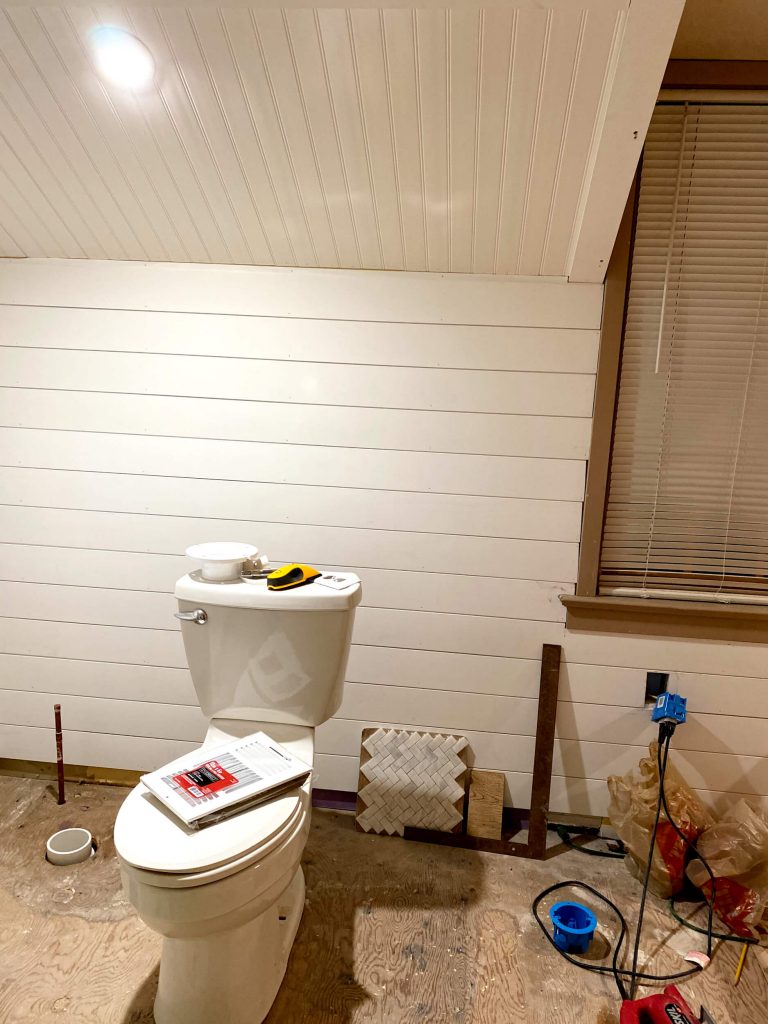
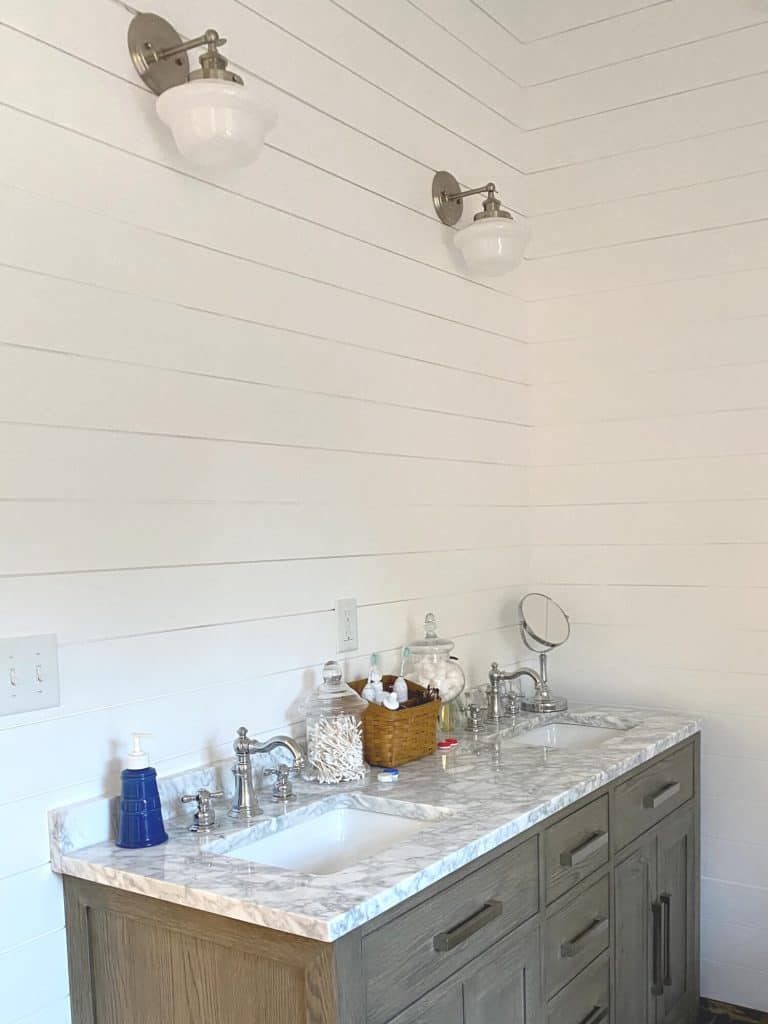
Can you believe this is the same spot as the one pictured above!
What a difference the bead board ceiling makes along with the shiplap in the master bath.

Adding Shiplap in the Master Bath
Once Jason had framed out our new shower/ bathtub combo we were ready to add the shiplap in the master bath on the walls.
We found the shiplap in stock at our local Home Depot (see it HERE)
We needed A LOT of shiplap in the master bath!
We measured & cut the shiplap boards to size with a circular saw in the garage.
We added a leger board around the bottom of the bathroom to keep the shiplap level when adding it to the master bath walls.
We marked where the wall studs were to make it easier to find them when we were nailing the shiplap in the master bath.

Using our handy dandy pressure finish nailer we added the shiplap in the master bath one board at a time starting from the bottom up.
You can see from the picture above that we added the finish nails to the hidden top section of the shiplap boards.
Shiplap is great because you can add it over wallpaper & ugly yellow paint like in our previous bathroom. 🙂

We filled the holes with plaster & sanded them down before painting.
Tips for Painting Shiplap in the Master Bath
We painted the shiplap in the master bath Sherwin Williams ultra white with an eggshell finish one coat coverage. (find it HERE)

The same paint we used on the vinyl bead board ceiling.
We rolled & brushed the shiplap boards after lying down paper to keep paint off the new tile on the bathroom floor. (Blog post coming soon)
My favorite tip for painting shiplap is to use a kids size paintbrush to the gaps in between the boards.

It works really well in the small spaces between the boards!
Shiplap in the Master Bath Reveal

Thanks so much for stopping by to see the DIY bead board ceiling & shiplap in the master bath!
I hope this inspires you to add bead board & shiplap to your homes.
I will be back soon to share more of our master bathroom remodel!!!
by Tara Lehman
Master Bathroom Remodel Ideas
Gut Bathroom & Take Out Tile
Add Bead Board Ceiling & shiplap in the master bath
Add a double vanity sink
Add tile to the floor & shower walls
Add a Large Soaking tub.
Add Finishing Touches & Decorate the Master Bathroom
Some More DIY Projects You Might Enjoy


This brings back so many memories of my husband and I renovating our old farmhouse back in 2010. We also did our ceiling in beadboard only we had to use the wood panel type. What a job sanding it all down first. Shiplap wasn’t on our radar back then, so we put beadboard on the walls as well. Hubby made a beautiful 5 ft tall and wide built in open shelved cupboard for baskets for all our toiletries and towels etc.. He did a wonderful job. Your bathroom turned out beautiful and your hubby did a great job…so did you! I’m glad I found your blog and I look forward to looking back on your DIY projects and other things you’ve posted.
Thanks so much for stopping by to check out our Shiplap & bead board ceiling in the master bathroom Maura! Your bathroom & that open cupboard your husband built sounds wonderful. Sanding bead board sounds like a huge job!!!