
Sharing all our tips & tricks for how to build the best DIY Raised Vegetable Garden Beds that last for your home garden on a budget with step by step instructions.
Including what size we built our raised vegetable garden beds using pressure treated boards & sharing our vegetable garden layout for 4 raised vegetable garden beds with veggies, fruit & herbs, pictures included!
Table of Contents
DIY Raised Vegetable Garden Beds that Last
*this post contains affiliate links for more information check out our disclosure page*

We expanded our raised Vegetable Garden Beds this year. I am sharing how we added 2 more raised beds this year using pressure treated boards & what vegetables, herbs & fruit we planted in them.
Raised Vegetable Garden Beds BEFORE
3 years ago, we built 2 cedar raised garden beds for our yard. (ryou can see them here)
Unfortunately, the cedar did not hold up over time.
The cedar boards started to come apart & to rot.
Yikes! See all the rot???

So… we replaced them & built 2 more raised vegetable garden beds!
Supplies & Plants Needed to Make 4 DIY Raised Garden Beds
- pressure treated boards (enough for 4 beds roughly 5 feet by 8.5 feet)
- saw to cut the wood
- exterior screws
- screwdriver
- pressure treated or cedar post to level out the raised vegetable garden beds
- chicken manure or compost
- vegetable soil suitable for raised vegetable garden beds or dirt
- vegetable plants, herbs & strawberries (we planted strawberries, asparagus, rhubarb, rosemary, thyme, mint, lettuce, onions, celery, carrots, peppers, squash, cucumber, sugar snap peas, corn & tomatoes)
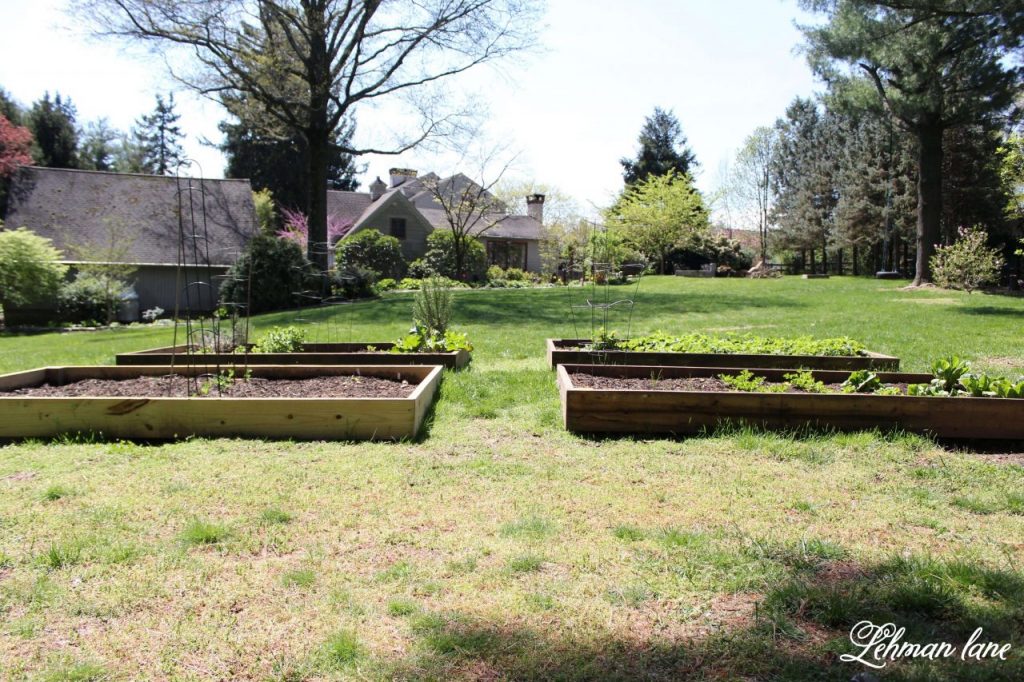
Size of our DIY Raised Vegetable Garden Beds
Our DIY raised vegetable garden beds are 104″ inches long, by 60″ deep, by 7.5-12″ tall depending on how sloped our backyard is. 🙂
Recycled Pressure Treated Boards for the Win!
We rebuilt the 2 rotted raised garden beds & added 2 beds more using mostly pressure treated boards from an old deck we tore down to make room for a brick & flagstone patio making this a budget friendly project.
(read about the deck & patio here)

That old deck wood has really come in handy!!!
We have built an arbor, horseshoe pit & now 3 of our 4 DIY raised vegetable garden beds with it.
Why we Chose Pressure Treated Wood
The fact that the pressure treated wood from our old deck was still in good shape after many years made us feel comfortable using pressure treated boards this time rather than having to replace the cedar ones every few years.
Using the wood we had, we were able to build 3 larger raised vegetable garden beds & bought a few more boards to add 1 more raised bed.
Step by Step Instructions for How to Build DIY Raised Vegetable Garden Beds
Step ONE – Cut the Pressure Treated Boards to Size
Jason sawed the boards to size with his miter saw.

Step TWO – Screw the Boards Together Making a Rectangle
We screwed the boards together with exterior screws making 4 large rectangles.

Our new beds are a little higher & wider than the previous 2 meaning I can plant so much more!!!
Our new raised vegetable garden beds are roughly 5 feet by 8.5 feet.
See the difference of our new DIY raised vegetable garden beds?

Step THREE – Leveling the Raised Garden Beds to Your Landscape
Jason cut a few old cedar posts for the corners of the raised garden bed to help level the boards on the uneven spots in our yard.
We added scrap wood to the empty gaps at the bottom of the raised vegetable garden bed in so the dirt would not spill out into the rest of the yard.

Step FOUR – Fill Your Raised Vegetable Garden Beds
We filled the bottom of the beds with chicken manure &compost which we have plenty of now thank to our 3 feathered family members.
We also added some organic vegetable garden soil suitable for raised vegetable garden beds
Next, we I added many wheel barrel loads of dirt & topped it with dirt.
Layout of our Raised Vegetable Garden Beds
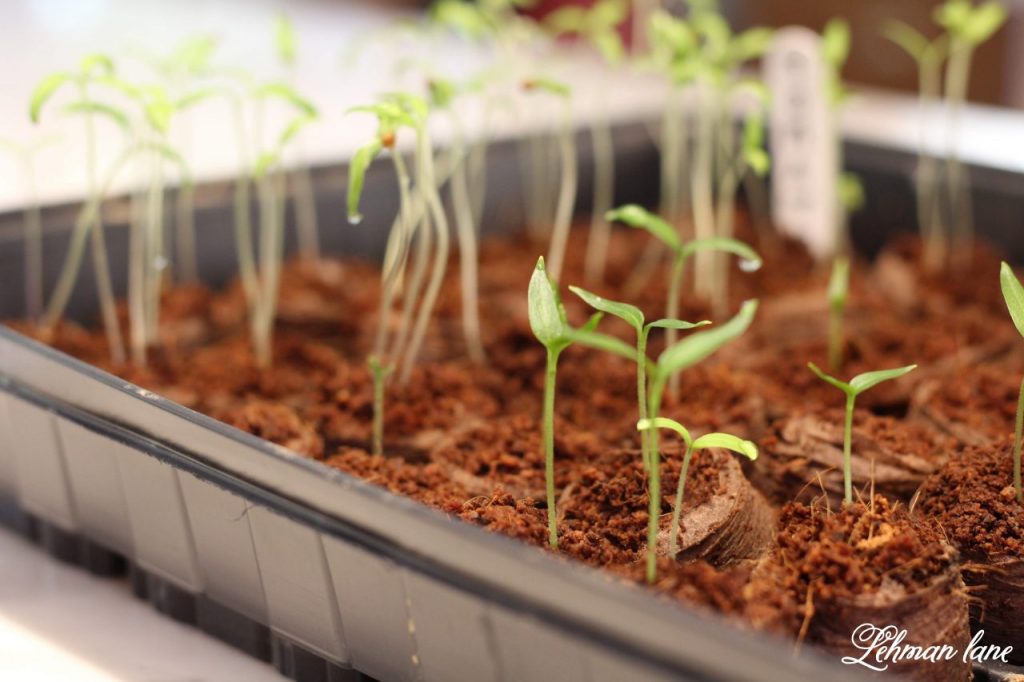
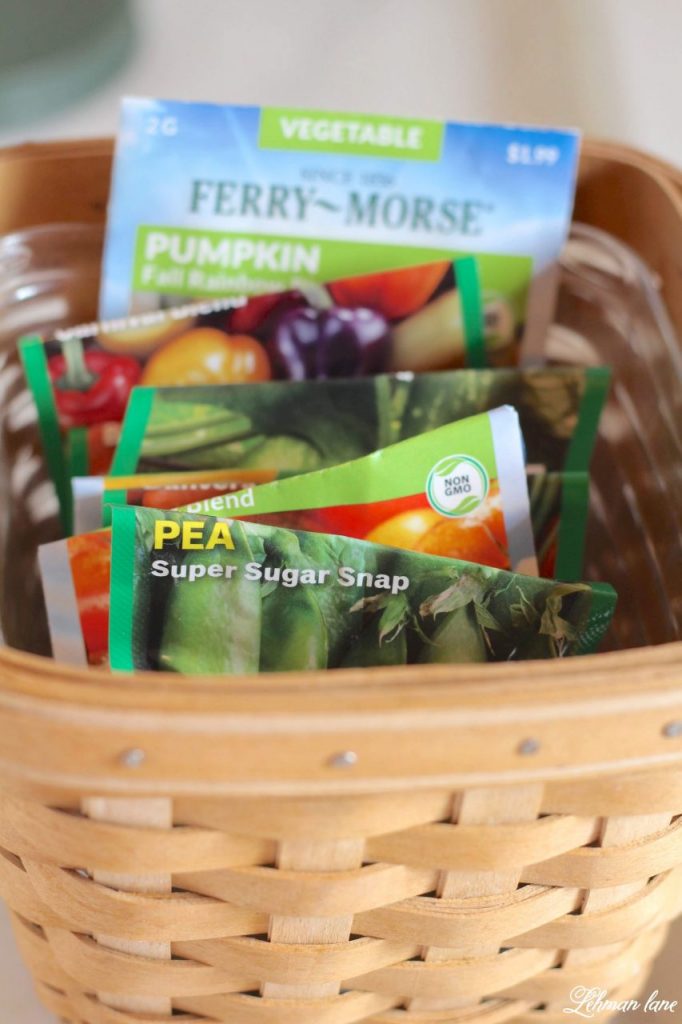
I grew vegetables from seed indoors this year for the first time in many, many years.
Raised Vegetable Garden Bed – Layout ONE
This bed has ALL the strawberries in it.
( you can read more about our home strawberry patch here)

Our family loves strawberries & it was important to grow A LOT of them in our home garden.
The strawberries come back every year & have taken over most of this garden!
The strawberries have already started to bloom.
I did add 2 blackberry bushes to the one end for now until we can find a better spot for them….maybe a blackberry raised bed in the future?…just need to talk Jason into it, ha!
Raised Vegetable Garden Bed Layout TWO
This garden bed has many of our perennial vegetables & herbs.
Asparagus, rhubarb, rosemary, thyme & mint come back every year!

I also added cilantro, parsley, basil & tomatoes this year.

I love that seeds are so much cheaper than buying plants & it will be fun to see how they do!

Raised Vegetable Garden Bed Layout THREE

This garden bed has lettuce, onions, celery, carrots & peppers in it.

Raised Vegetable Garden Bed FOUR
This garden bed has squash, cucumber, sugar snap peas, corn & more tomatoes.

Unfortunately, the chickens have eaten all of our cucumber plants while leaving everything else….
I added a few more cucumber seeds to the garden bed today hoping they will forget they like them.
DIY Garden Arbor & Chicken Wire Surrounding the DIY Raised Vegetable Garden Beds

*Update… We gave our Vegetable Garden Beds a Makeover with an Arbor & fencing (read all about the DIY project here)
I hope this answers all of your questions & inspires you to create raised vegetable garden beds for your home backyard.
by Tara Lehman
Don’t Forget to Pin our DIY Raised Vegetable Garden Beds or Add them to Your Favorite Pinterest Gardening Board!

More Gardening Ideas You Might Enjoy


