
Sharing all the tips & tricks for how to lay an Amazing DIY brick patio over dirt using reclaimed bricks on a budget!
We finally finished the brick portion of our sunken patio project. This DIY brick patio project took way longer than I ever imagined but I couldn’t be happier with how it turned out!
Our DIY backyard brick patio looks Amazing & has completely transformed how we use our backyard.
And, the best part is because we did the work ourselves we were able to keep the cost down & kept this DIY project to less than $500.
Table of Contents
Amazing DIY Brick Patio on a Budget
*this post contains affiliate links for more information check out our disclosure page here*

Our Backyard Before our DIY Brick Patio
After taking down the deck at the start of this project we were SUPER excited to find the original brick patio still here that there was no question that we wanted to bring the old brick back.

Just look at that gorgeous brick!!!

Reclaimed Bricks
I am still completely perplexed as to why someone would cover a brick patio to begin with but it became clear as we were pulling up the old bricks that they were never laid properly to begin with.

Why it’s Important to Lay a DIY Brick Patio Correctly
There was no layer of rock or crushed stone under the bricks only a layer of sand which is why the patio was so uneven & weed filled when we moved in.

Supplies & Tools Needed to Build a DIY Brick Patio
- brick
- wheel barrel
- shovel
- rake
- rubber mallet
- grit or crushed stone
- sand
- leveling string
- tamper
- tile saw
- push broom
Instructions for How to Build a DIY Brick Patio Step by Step
Step ONE – Digging
After finishing the wood retaining wall, we started digging & leveling out the dirt inside of the walls.
We had to take out many, many wheel barrel loads of dirt.

Step TWO – Add Grit or Crushed Stone
We had a truck load of grit (or crushed stone), dumped in our driveway.
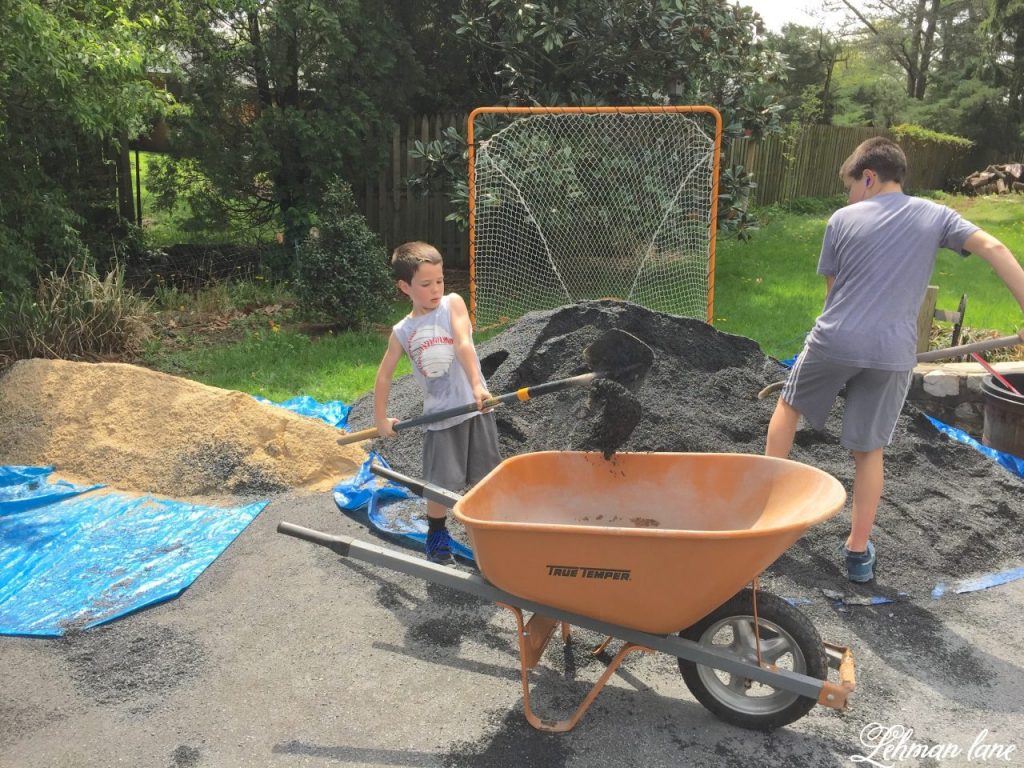
With the kids help we brought back wheel barrel after wheel barrel after wheel barrel of grit back to our patio until we had a few inches of crushed stone.

This crushed stone will make our patio base strong.

Step THREE – Leveling out the Crushed Stone
Jason strung a few level lines of string as a guide to make sure we were keeping everything level.

Jason tamped the crushed stone so it was level.

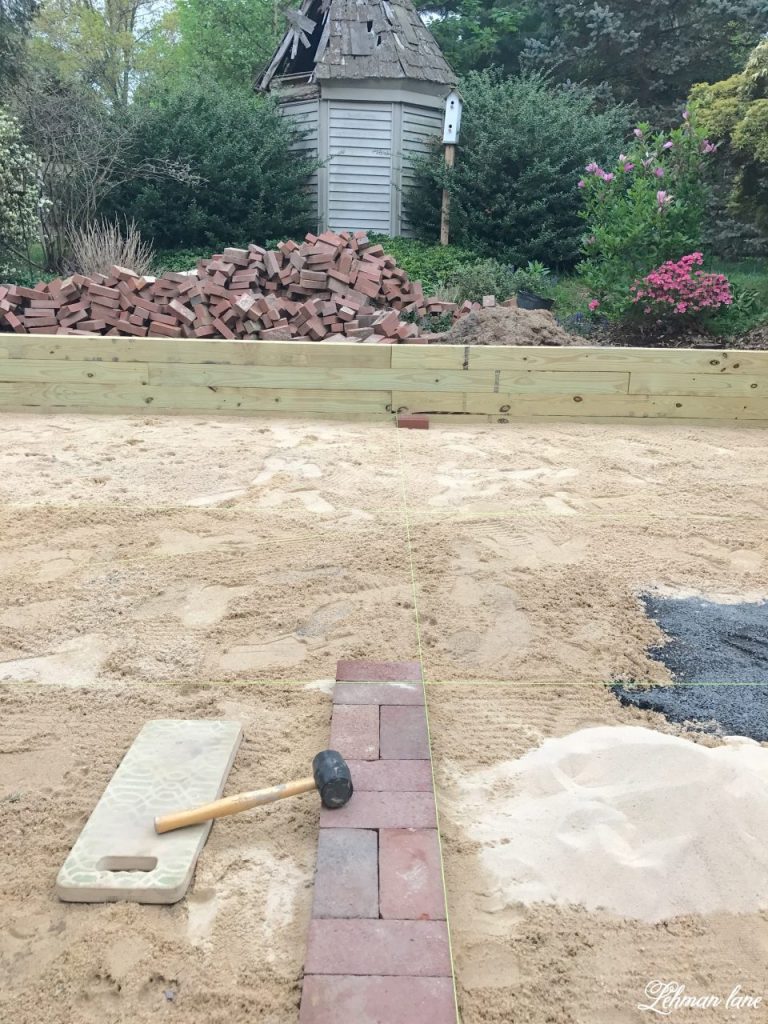
Step FOUR – Add Sand & Level Again
Once the crushed stone was in & level we brought in many wheel barrel loads of sand until we had 1-2 inches of sand.

Once the sand was level we were able to start bringing the brick back for the DIY brick patio.
Step FIVE – Add Bricks & Start Laying the DIY Brick Patio

It was my job to clean off any dirt on each of the bricks for our DIY Brick Patio.

I found that a wire brush did the best job to get the dirt off.
Jason started laying the bricks down the middle of the patio & then across the middle until we had 4 separate squares.
Laying Out the DIY Brick Patio in a Basket Weave Pattern
We decide to lay the bricks in a basket weave pattern.

He leveled each brick using a rubber mallet making sure to keep the bricks in line with the level string line he had added before.

He added the bricks one square section at a time.
This task took FOREVER!!!
Not all the bricks were the same size as we had once thought making this process a little more difficult than we once believed.
It took a couple long days until most of the brick for our DIY brick patio was laid.
I was excited to find this vintage stamped oil brick among the pile & made sure to include it with the patio.

Step SIX – Cutting the Bricks to Fit the DIY Brick Patio
Jason used our tile saw to cut the bricks along the edges of the DIY brick patio. Using the tile saw to cut the bricks was a messy job. Jason was covered from head to toe in wet red brick dust.


Step SEVEN – Adding Sand to the Cracks of the DIY Brick Patio
Once every brick was laid it was my job to sweep sand in the cracks of our DIY brick patio.


We FINALLY finished the DIY brick patio late Sunday night.
I didn’t even wait two minutes before I started dragging our patio furniture back in, ha!

We were all so excited about finishing our DIY brick patio that Jason & I agreed to let the kids go for a quick swim in our hot tub as well as enjoy some s’mores.

They worked sooo hard to help us make this DIY brick patio & we wanted to reward their efforts despite the fact that it was a school night.

Our 13 year old found this awesome fire pit in the trash & brought it home for us knowing that it was something we would appreciate.
I couldn’t be prouder of him for his trash picking skills. 🙂
The area in front of the sliding doors will have a new flagstone patio & we still need to landscape around the DIY brick patio but we are so excited to be enjoying this part of our yard again!

FINISHED Backyard DIY Brick Patio (read all about it HERE)
Our Backyard Patio Makeover is DONE, We demoed the previous Deck (HERE), Moved our Hot Tub with just 2 People (HERE), Added a Wood Retaining Wall (HERE), Added a Flagstone Patio (HERE), Gave our Vintage Patio Set a Makeover with Spray Paint (HERE) & Build a Wooden Arbor (HERE).

I hope this inspires you & answers all your questions about how to build a DIY brick patio!
by Tara Lehman
Don’t forget to Pin & Save our DIY brick Patio for your next DIY backyard project!

Some More DIY Outdoor Projects You Might Enjoy


Wow, you and your family did an excellent job on a very big job. I love what you did.
Thank you so much for stopping by to check out our brick patio Ivory! This project really was a big one but we are thankful to be able to use this outdoor space again :).
Your yard is gorgeous, the brick is gorgeous. Well done in the persistent and effort it took to finish it. Gorgeous now.
Thank you so much Leanna! This brick patio project definitely took a long time to finish but we are really happy it’s done
I love how you all pitched in to get this done! It’s a stunning space you will all love and have fun memories! Wow, terrific work!
Thank you Carolann! It was a lot of work but with the kids help we finally got it done 🙂
Is that a fireplace chimney outside on your patio in between the sliding doors? That could be a great place for beautiful decor with paint, stucco or outdoor faux finishes. What a great job you and your family have done on the patio. Goes to show even little ones can help on a project that benefits the entire family.
Thanks so much for stopping by to check out our new brick patio Pat! We would not have been finished as quickly if it wasn’t for our kids helping! So funny that you pointed out our fireplace chimney because my 6 year old just told me the other day that I needed to do something about all the peeling paint on it :). Not sure yet what we have planned but I think we will definitely be saying goodbye to the pink chimney paint the precious owner used!
It looks like it was worth the wait! So cute to see your family pitch in and help! Enjoy it this summer!
Thanks so much for stopping by to see our new brick patio Carrie!
What a great makeover! And so lovely to see your kiddies getting in there and helping! You all must be tickled pink with your new patio! Looks awesome!
Thank you so much for stopping by to see our brick patio Sam! We definitely couldn’t have done it without our kiddos 😉
Very nice, awesome find from your 13 year old!
Thank you so much Chantell! I couldn’t be prouder that he shares my love for trash picking 🙂